This post may contain affiliate links and I may earn compensation when the links are used at no additional cost to you. See full disclosure policy here: https://wakeupandbesavvy.com/disclosure-policy
Recently I planned a baby shower for a good friend of mine (on a tight budget). I tag-teamed the planning with the grandma to be. I was in charge of decorations and games and she was in charge of food. In a previous post, I talked about how I got all the decorations and favors on a strict budget.
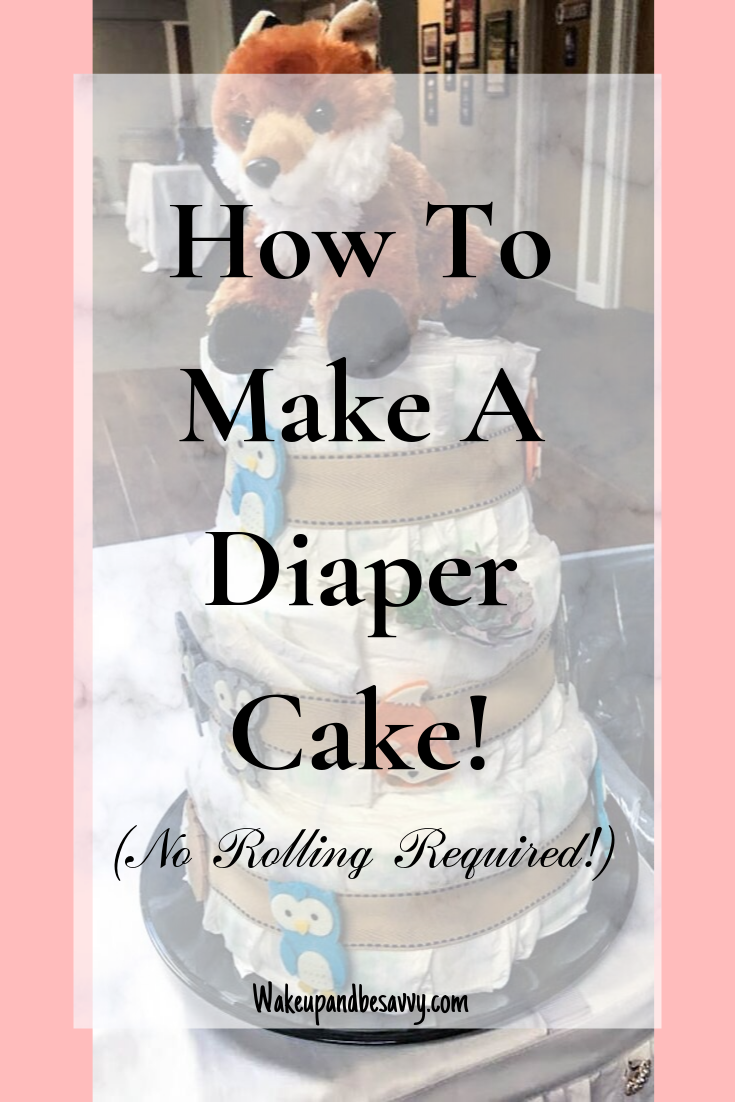
In that post, I talked about how I made a diaper cake and used that as a decoration item, but it also doubled as a gift for the mom-to-be as well. Here are the step-by-step instructions on how I made it:
Diaper Cake Supplies
In order to create this diaper cake, you need one package of diapers, rubber bands, ribbon, some sort of tray, a topper (I used a stuffed animal), and some little decorations/stickers to fit your theme.
You will also need different sized pots/pans in order to shape the diapers. I bought a large pack of diapers and just gifted her the leftovers. Also, make sure to check the parent’s registry to see if they are looking for a specific brand of diaper.
First Steps
This method of making a diaper cake was a lot easier than rolling each individual diaper. Basically, you place one diaper at a time around the border of the pot. Place the next diaper one to two inches offset of the one before.
Then just keep adding diapers. As you keep adding diaper, they will start to spiral towards the middle of the pot. Keep adding diapers until the pot is completely full (to the point where you couldn’t even add one more diaper). It needs to be tight or it may not hold its shape.
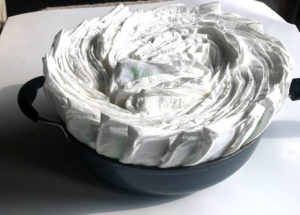
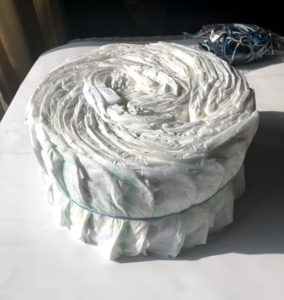
One the pot is completely full of diapers, you need to secure them with the rubber bands (before removing from pot). This way you are able to take them out of the pot and they will hold their shape.
The rubber bands will be covered by the ribbon later, so try to use like five rubber bands that are spread out to the thickness of your ribbon. Don’t place all five rubber bands on top of each other. Place one in the center of the cake, one a little more towards the top and one more towards the bottom.
Next Steps
Once the first layer is secure, repeat the process for two more layers. For the first layer, I used a frying pan as my size guide. For the second layer, I used a saucepan and for the third layer, I used a very small saucepan.
Once all layers a made and secured with rubber bands, we are ready to add the ribbon. The ribbon will need to be cut to a length that will completely cover the rubber bands. I secured mine with a very small amount of hot glue. I used a very thick ribbon, so if you use a thin ribbon you need to make really sure to not get any hot glue on the diapers.
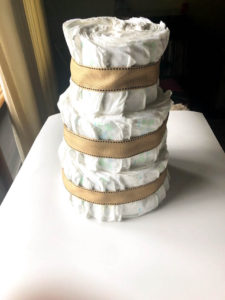
Next, I just stacked the layers on top of each other. You can use a dowel in the middle if you want to have it be more secure, but mine stayed just fine without them.
Final Steps and Finished Diaper Cake
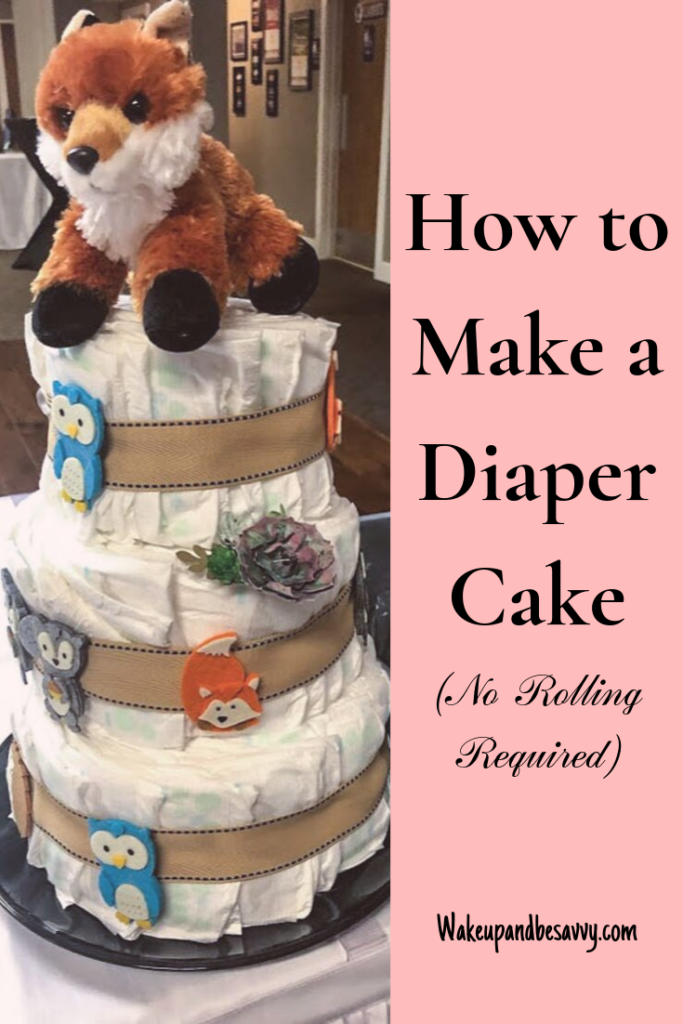
Now its time to decorate. I bought these felt stickers at Hobby Lobby. They matched her theme perfectly and were very easy to use. I also used this small stuffed animal as a topper.

You can use whatever you want. Try to fit the theme of the shower if possible. You could also use other gifts as decoration, such as onesies, socks, bottles, anything really.
Have you ever made a diaper cake before?